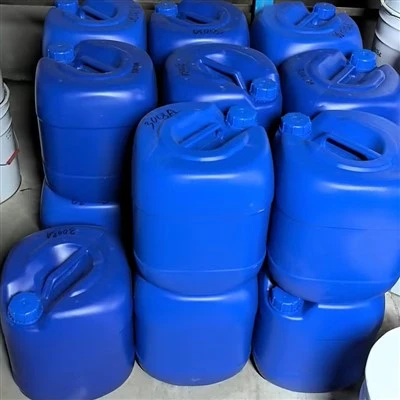

Applying woodworking adhesives evenly is crucial for a successful woodworking project. As a woodworking adhesives supplier, I've seen firsthand how the right application technique can make or break a piece. In this blog post, I'll share some tips and tricks on how to apply woodworking adhesives evenly, ensuring a strong and durable bond.
Understanding Your Adhesive
Before you start applying any adhesive, it's important to understand its properties. Different adhesives have different drying times, viscosities, and bonding strengths. For example, Heat Activated Veneer Glue is designed specifically for veneering and requires heat to activate the bonding process. On the other hand, Professional Wood Glue is a general-purpose glue that works well for most woodworking projects.
Reading the manufacturer's instructions is a must. They'll give you specific details on how to prepare the surfaces, the recommended application method, and the curing time. This information is golden and can save you a lot of headaches down the road.
Preparing the Wood Surfaces
The key to a strong bond is clean, dry, and smooth wood surfaces. Any dirt, dust, or moisture can interfere with the adhesive's ability to bond properly. Start by sanding the surfaces to be glued. This not only removes any rough patches but also creates a slightly porous surface for the adhesive to grip onto.
After sanding, use a clean, dry cloth to wipe away any sawdust. You can also use a tack cloth for a more thorough clean. If the wood has any oils or resins, you may need to use a solvent to clean the surfaces. Just make sure to let the solvent evaporate completely before applying the adhesive.


Choosing the Right Application Tool
The tool you use to apply the adhesive can have a big impact on how evenly it's spread. For thin adhesives, like some types of epoxy, you can use a brush. A good quality natural bristle brush will give you a smooth and even application. Make sure to choose a brush size that's appropriate for the area you're gluing.
For thicker adhesives, a putty knife or a notched trowel can be a better option. These tools allow you to spread the adhesive more evenly and control the amount you're applying. You can also use a caulking gun for adhesives that come in tubes. This is a great option for applying adhesives in tight spaces or for creating a bead of adhesive.
Applying the Adhesive
Once you've chosen your application tool, it's time to start applying the adhesive. Start by applying a thin, even layer of adhesive to one of the wood surfaces. If you're using a brush, make sure to brush in the direction of the wood grain to avoid creating air bubbles. If you're using a putty knife or trowel, use smooth, even strokes to spread the adhesive.
Don't apply too much adhesive. A thick layer of adhesive can take longer to dry and may not bond as well. On the other hand, a thin layer may not provide enough bonding strength. The goal is to apply just enough adhesive to create a strong bond without leaving any excess.
Joining the Wood Pieces
After applying the adhesive, quickly join the wood pieces together. Make sure they're aligned properly and apply firm pressure to squeeze out any excess adhesive. You can use clamps to hold the pieces together while the adhesive dries. Make sure to tighten the clamps evenly to avoid any gaps or uneven pressure.
If you're working with a large surface area, you may need to use multiple clamps. You can also use a bar clamp or a pipe clamp for larger projects. Just make sure to place the clamps in a way that won't damage the wood.
Removing Excess Adhesive
Once the wood pieces are joined and clamped, you'll need to remove any excess adhesive. You can use a damp cloth or sponge to wipe away the excess while the adhesive is still wet. This will prevent the adhesive from hardening and leaving a messy residue.
If the adhesive has already dried, you can use a sharp knife or a scraper to remove it. Just be careful not to scratch the wood surface. You can also sand the area lightly to smooth out any rough edges.
Curing and Drying
The curing and drying time of the adhesive will depend on the type of adhesive you're using and the environmental conditions. Most adhesives will dry to the touch within a few hours, but they may take several days to fully cure.
During the curing process, it's important to keep the wood pieces clamped and in a stable environment. Avoid moving or disturbing the pieces until the adhesive has fully cured. This will ensure a strong and durable bond.
Troubleshooting
Even with the best preparation and application techniques, you may still encounter some problems with your woodworking adhesives. Here are some common issues and how to fix them:
- Poor Bonding: If the adhesive doesn't seem to be bonding properly, it could be due to dirty or oily surfaces, improper application, or using the wrong type of adhesive. Make sure to clean the surfaces thoroughly, apply the adhesive evenly, and choose the right adhesive for your project.
- Air Bubbles: Air bubbles can occur if the adhesive is applied too thickly or if there's too much moisture on the wood surfaces. Try applying a thinner layer of adhesive and make sure the surfaces are dry before gluing.
- Excess Adhesive: If you apply too much adhesive, it can create a messy and uneven bond. Use a damp cloth or sponge to wipe away the excess while the adhesive is still wet.
- Slow Drying: If the adhesive is taking a long time to dry, it could be due to low humidity or low temperatures. Try increasing the humidity or temperature in the area where you're working.
Conclusion
Applying woodworking adhesives evenly is an important skill for any woodworker. By understanding your adhesive, preparing the wood surfaces, choosing the right application tool, and following the proper application techniques, you can ensure a strong and durable bond.
If you have any questions or need help choosing the right woodworking adhesive for your project, don't hesitate to reach out. We're here to help you make the most of your woodworking projects. Whether you need Two Part Epoxy for Woodworking, Glue for Wood Joining, or Finger-Joint Adhesive, we've got you covered.
Contact us today to discuss your woodworking adhesive needs and start your next project with confidence.
References
- Woodworking Magazine
- The Complete Guide to Woodworking Adhesives